
A smokey eye makeup look is the epitome of cool, and being a Gen Xer, I guess it makes sense that I feel that way. Many of my heroes rocked a smokey eye in the ’80s and ’90s: Kim Gordon, Carine Roitfeld, Joan Jett, Shirley Manson, Siouxie Sioux; the list is long and grungy.
Sadly, in all of my 53 years, I have never figured out how to create a smokey eye myself. Not that I tried—it seemed so intimidating, requiring multiple colors, brushes, and mysterious techniques. (Little did I know that Ms. Roitfeld’s secret to the perfect eye makeup is to sleep in it.)
So, I was giddy to learn Brigitte Caille’s easy, five-minute (or less!) method. I sat down with Caille to discuss the tutorial over the phone, which you can listen to here if you’re an aural learner. We also chat about makeup, gray hair, and what it means to get older in 2022.
Or, if you just want to learn her smokey eye technique, keep reading for the step-by-step process.
Smokey Eye Supplies
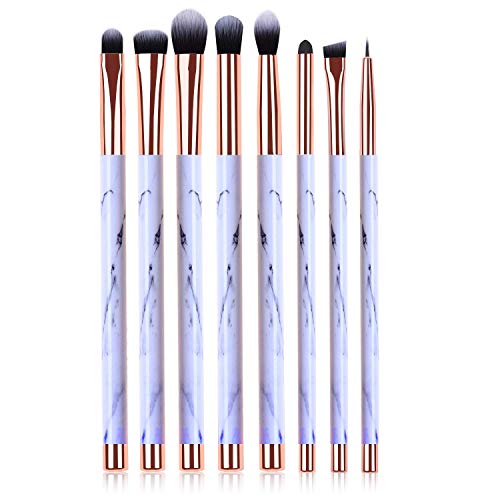
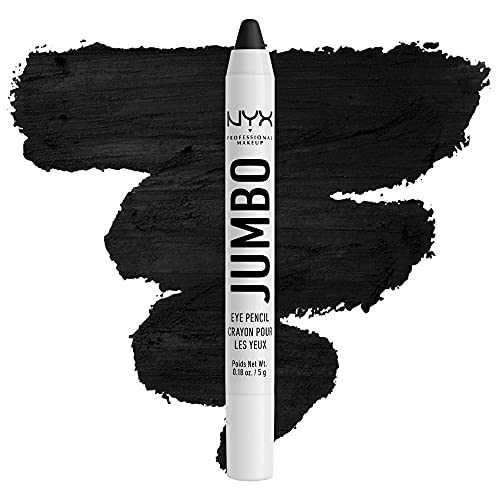
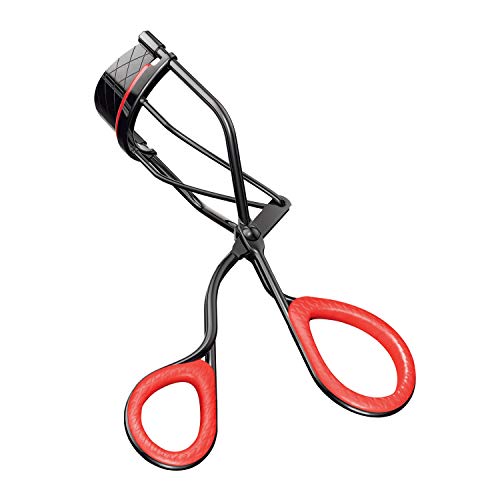
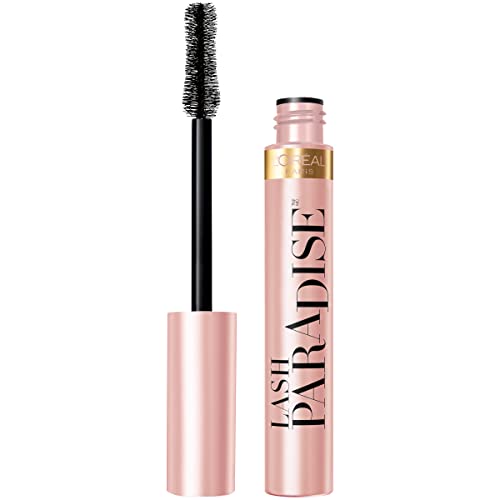
The first step in creating this simple smokey eye is to arm yourself with the right supplies. This tutorial requires an eye crayon, blending brushes, an eyelash curler, and mascara. Feel free to use your favorite brands (read: whatever’s in your makeup bag right now). Or, check out our recommendations below.
Step-By-Step Smokey Eye
- Apply eye crayon color to the eyelid in a half-moon shape, starting at your lash line and stopping before the crease.
- Using a fluffy brush, blend the arc of the half-moon into your crease until there are no definite lines visible.
- Apply the eye crayon to your lower lash line, joining the color at the outer corner of your eyes.
- Using a smaller, firmer brush (a good ol’ Q-tip also works), blend the color along the bottom of the lash line so that the color looks even and soft.
- Curl your eyelashes.
- Apply mascara.
- Smolder into the mirror for a few minutes (okay, this part’s optional).
Extra Tips For Creating The Perfect Smokey Look
- Make sure the color goes all the way to your upper lash line. If you notice any white space between your lashes and the lid, try gently nuzzling the crayon right into your lashes so that the color covers all of your visible lid.
- If your eyes are hooded, you may need to blend the color up higher above your crease. Keep blending until you can see the makeup while looking straight ahead in the mirror.
- For a more intense look, line the upper and lower water line.
- If you don’t already have a crayon you like, Brigitte suggests testing before you buy to find one that’s compatible with your skin type. If you have oilier skin, you’ll do better with a crayon that goes on drier, so the color doesn’t easily melt off. If your skin is dry, you might want a creamier crayon that contains more moisturizing ingredients. Otherwise, the color might set too quickly, and you’ll have trouble blending.
- Don’t worry about it looking perfect. It shouldn’t! It should be a casual, stress-free, five-minute (or less!) application.